
Hey Canva mates! Welcome back to another interesting guide about Canva Graphics tutorials. You might used the Canva frames in your design, template or social media graphics, but have you noticed that there’s limited number of frames which you use.
Have you ever thought about whether can I create frames in which I can drag & drop any images, or design to make my design awesome? So this article is absolutely for you.
In this article, we’ll guide how you can create your frames in Canva and you don’t need any kind of license to use it. Sounds good?
Tools we need
| Canva | Free or pro both version is eligible to perform this task |
| MicroSoft Powerpoint | We need PowerPoint to create shape that will convert in Canva frames |
| PC/Laptop | Any pc laptop in working condition is good to create frames |
Download Canva and MicroSoft Powerpoint Officially
| Canva for Web Browser | Create Design Now |
| Canva For Mac | Download |
| Canva For Windows | Download |
| Microsoft Powerpoint | Download |
Guide to Create your Canva Frames
Video Format
Step by step guide –
- First, go to the Canva official website and create any size document.
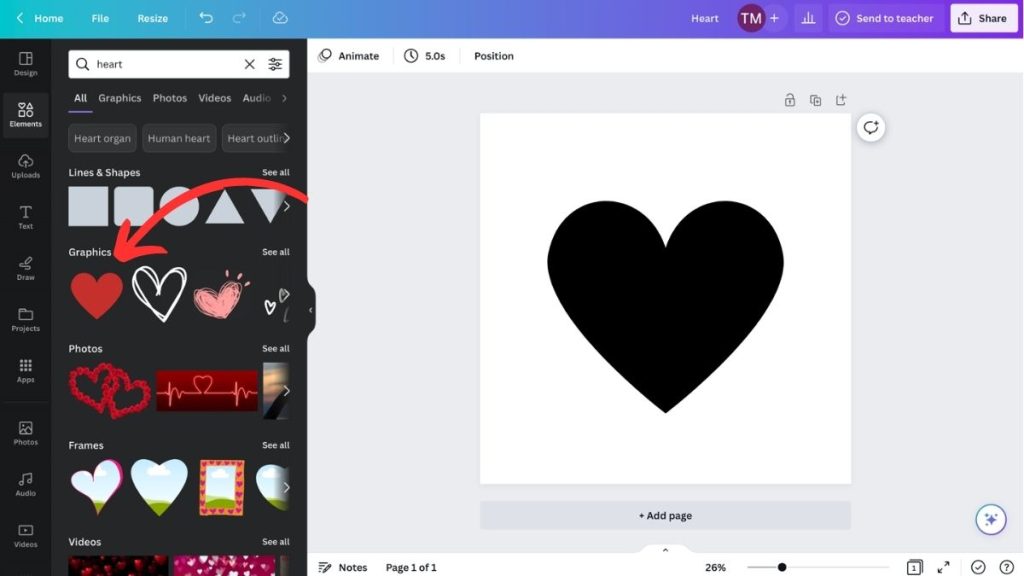
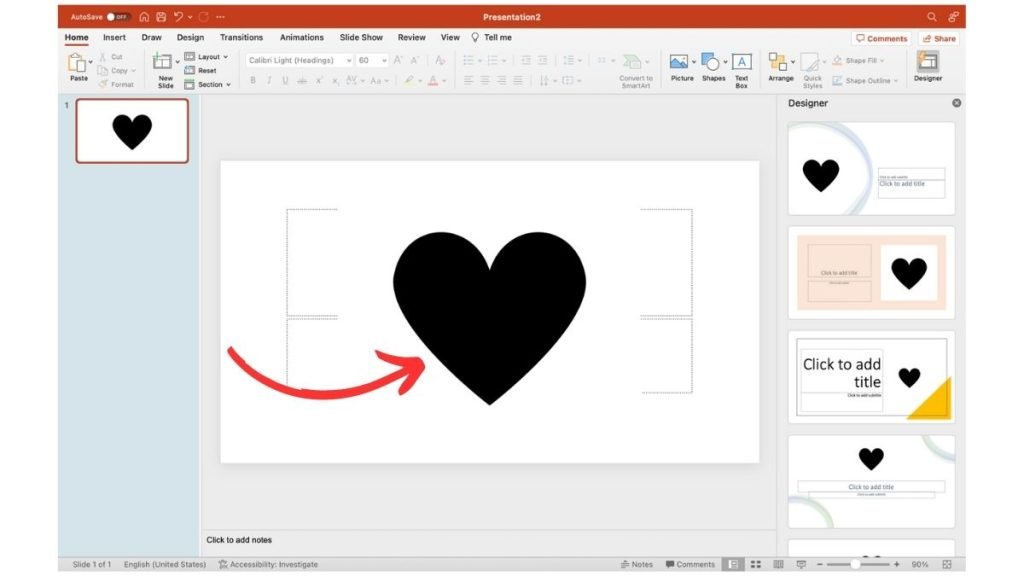
- Next, search for any elements and insert them into your design. We’ve selected the heart shape in elements.
- Now export the design in SVG format. (For this Click on share in top right corner>>download>>SVG)
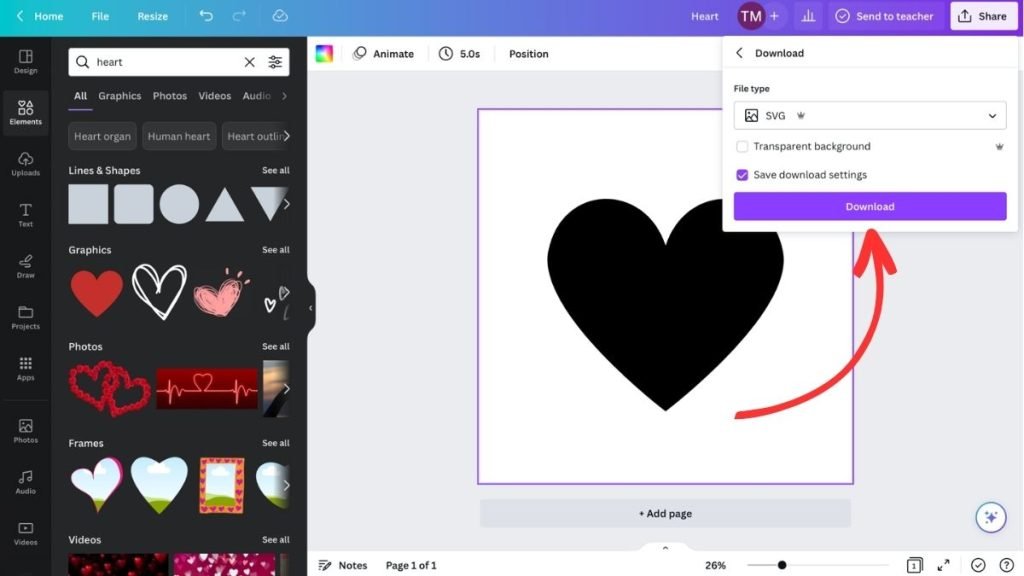
Note – We are supposing you’ve successfully downloaded the SVG file from canvas.
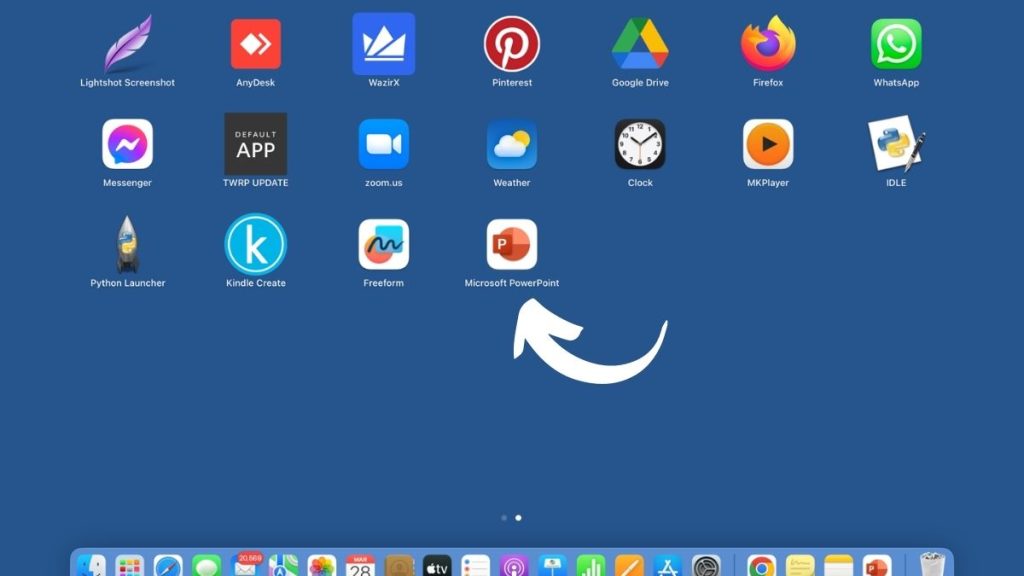
- Now open Microsoft Powerpoint on your Laptop/PC. (In our case we’re using MacBook during this tutorial but feature of MS Powerpoint are the same on windows and MAC)
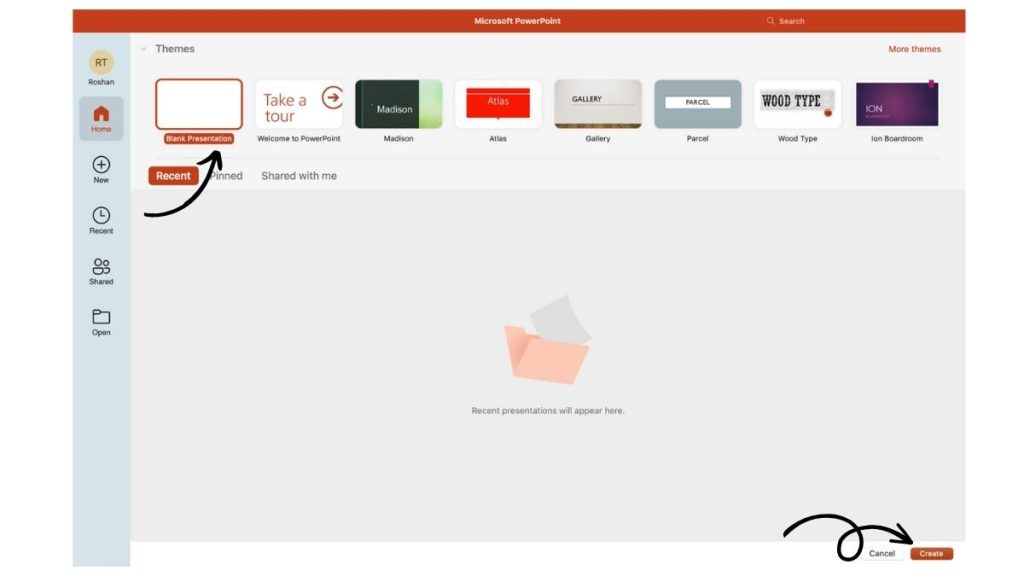
- Next, select the Blank Presentation (by default selected) and then click on Create button.
- A clean dashboard will appear in front of you. (You don’t need to do anything here)
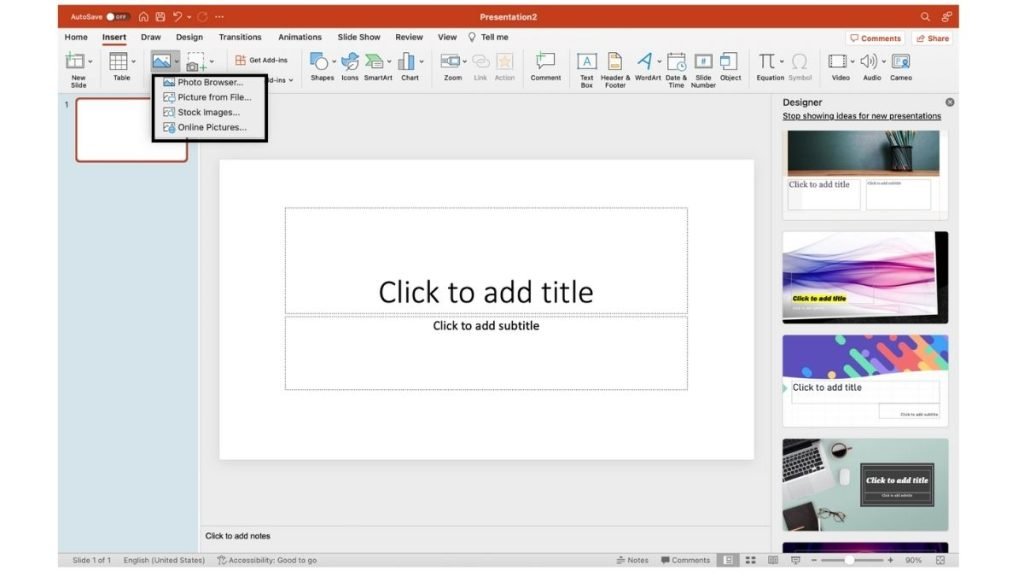
- On the top left corner click on the insert button then click on pictures. (In short Insert<<Pictures)
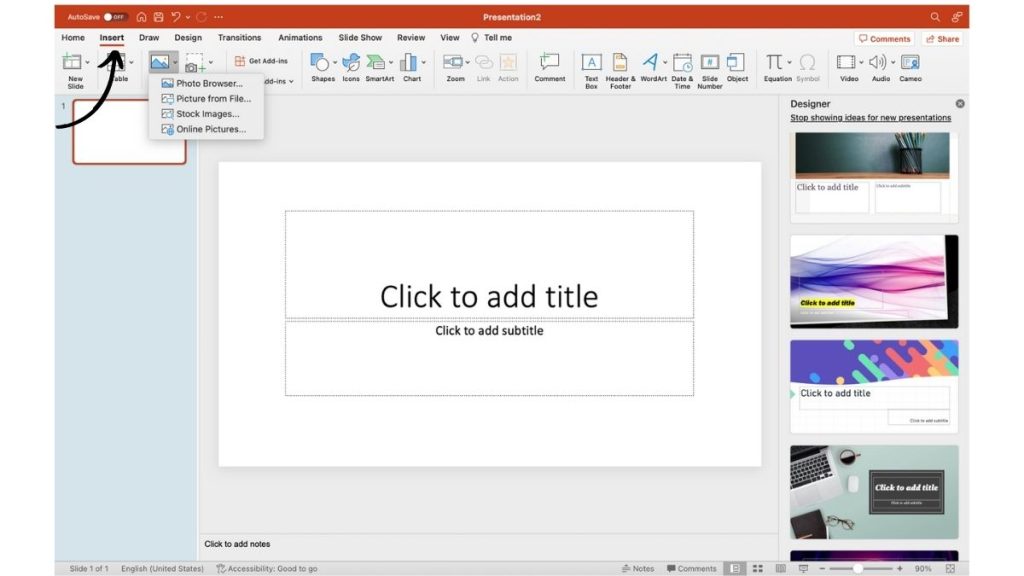
Now you’ll 4 options –
- Photo Browser
- Picture from file
- Stock images
- Online Images
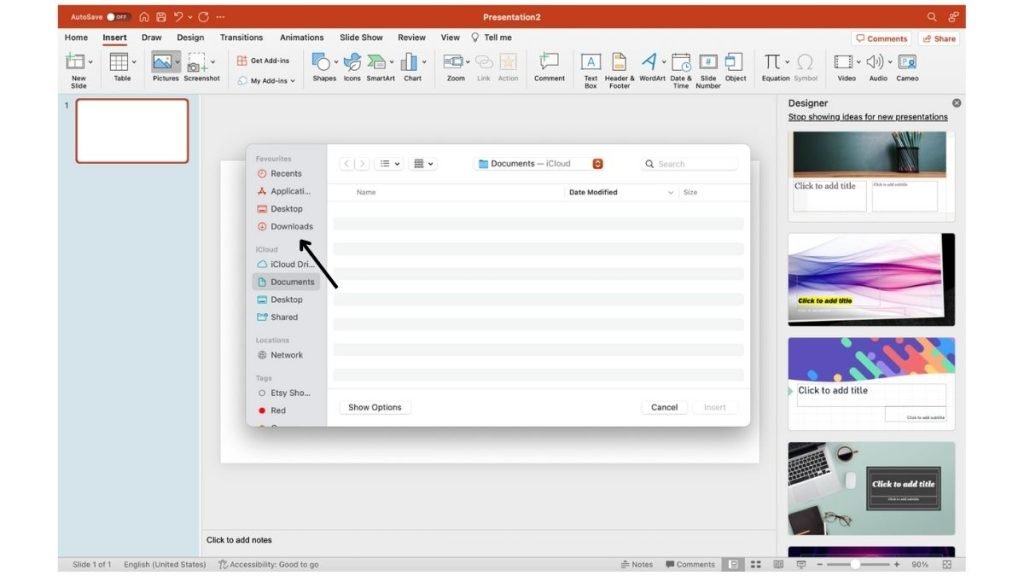
- You have to click on the Picture from file option. Now your device file manager will open where you can select the SVG file which you’ve downloaded from Canva in the above step.
- Now the SVG file is successfully imported into your Microsoft PowerPoint slide. As you can see below screenshot.
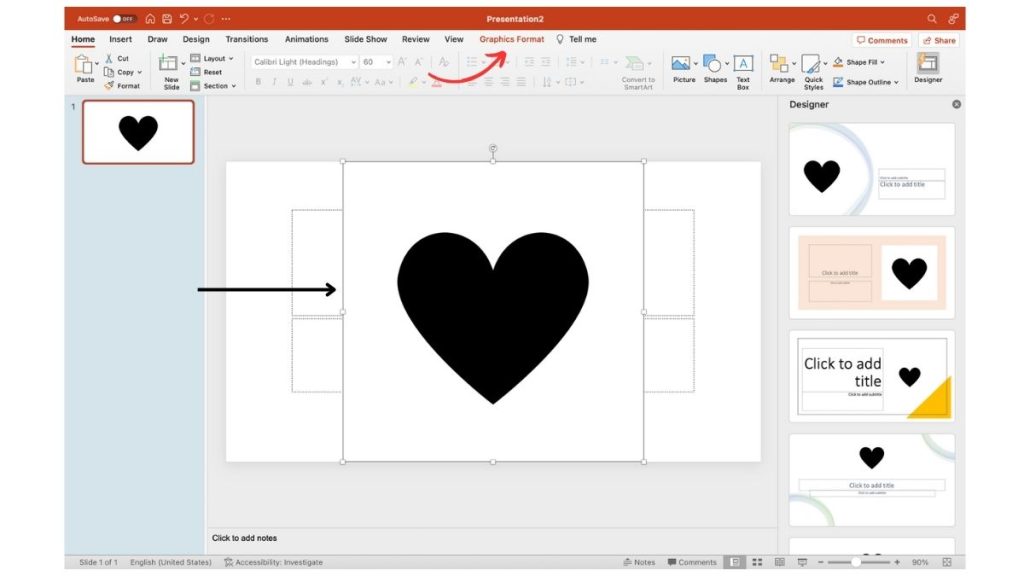
- Next click on the SVG file you’ve imported. A new header menu button names Graphics Format will appear on your dashboard. (Check below)
- Click on the Graphics Format and then click on the Convert to Shape button in top left corner.
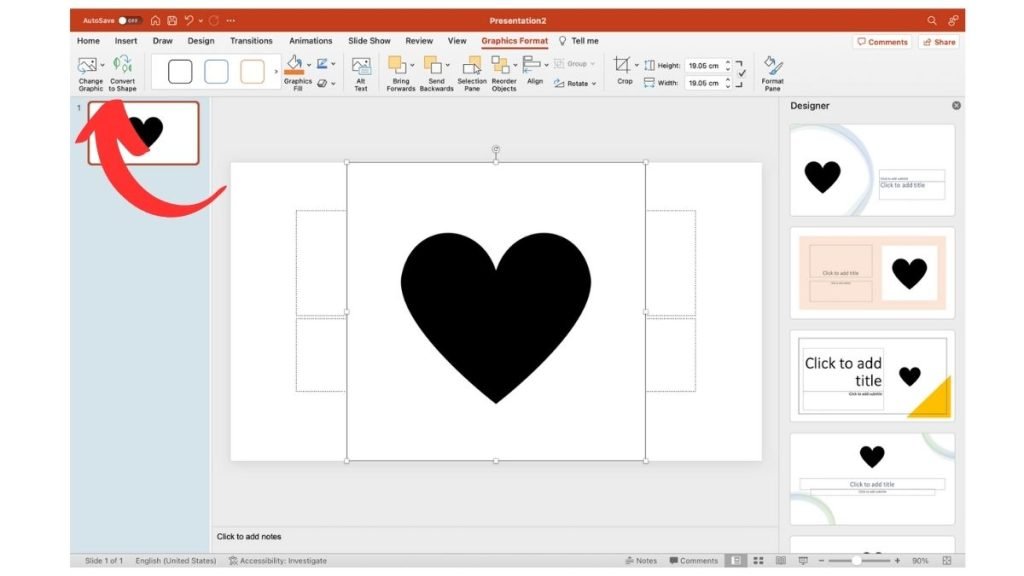
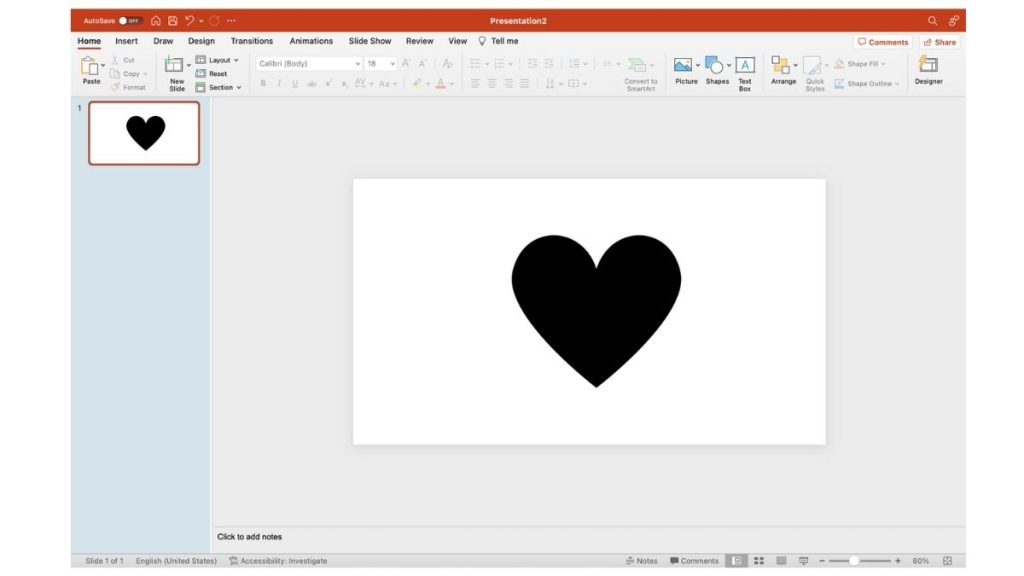
- Now your design is successfully converted into shape. Next, clear all the background elements and make the background blank. Just your design (SVG) file should be there like this –
- Next click on the SVG file you imported then click on the shape to fill the dropdown menu button which is available in the top right corner.
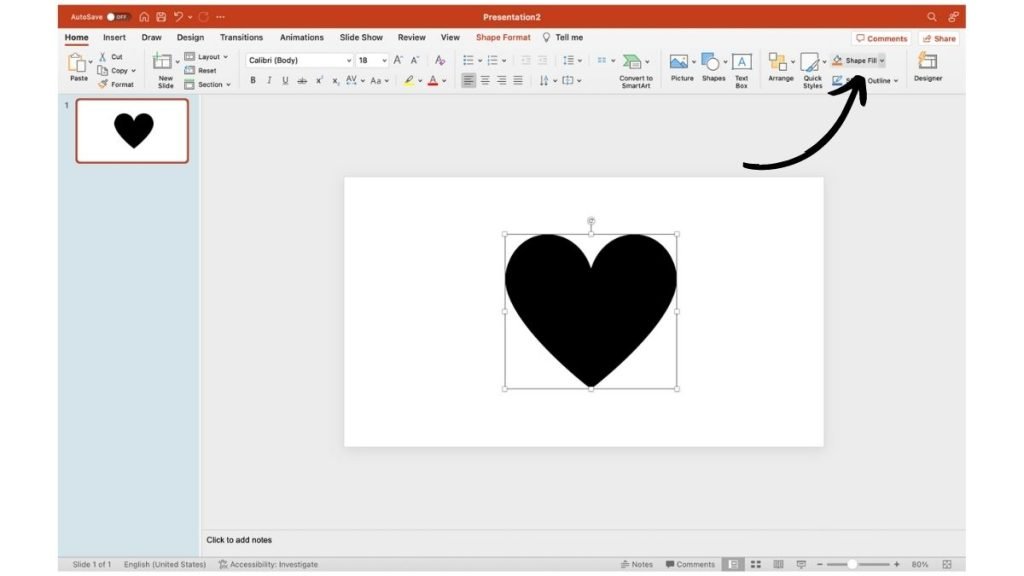
- Then click on pictures features.

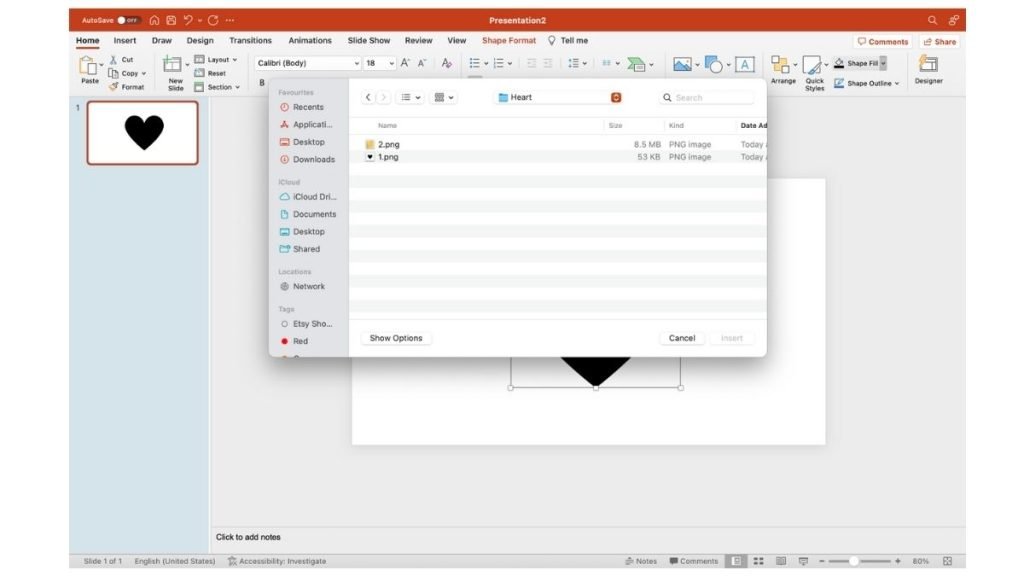
- Your device file will open to select the file in which you want to fill the shape. (In our case we’ve selected the gold paper background png)
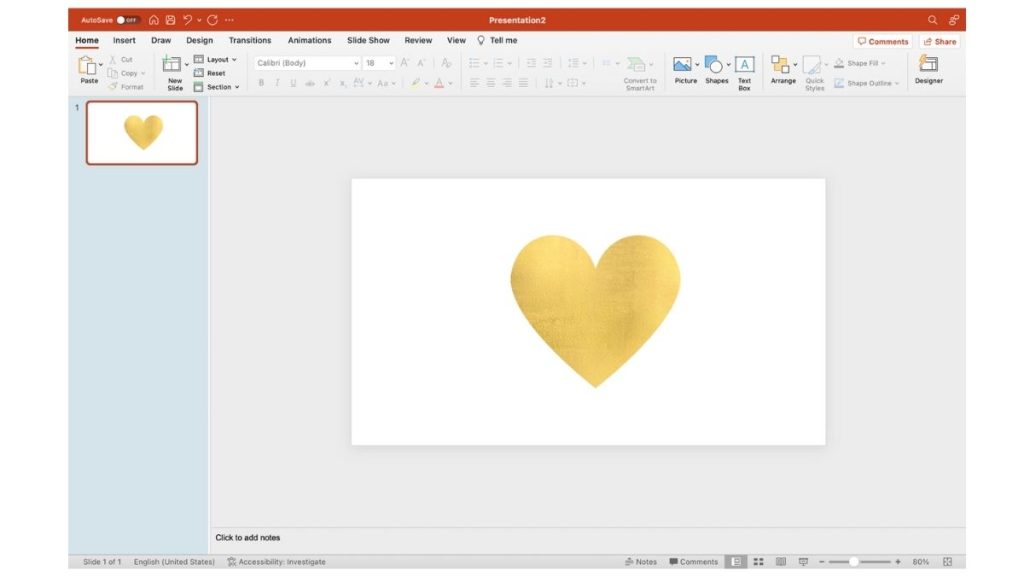
- Now you can see, our gold paper background is filled in shape.
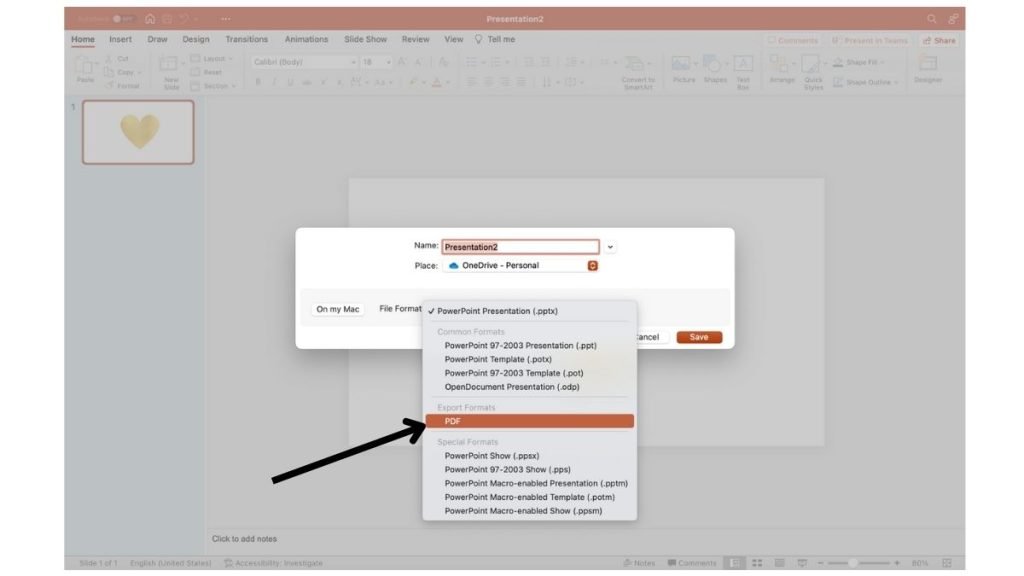
- Everything is done next click on the save button in top left corner.
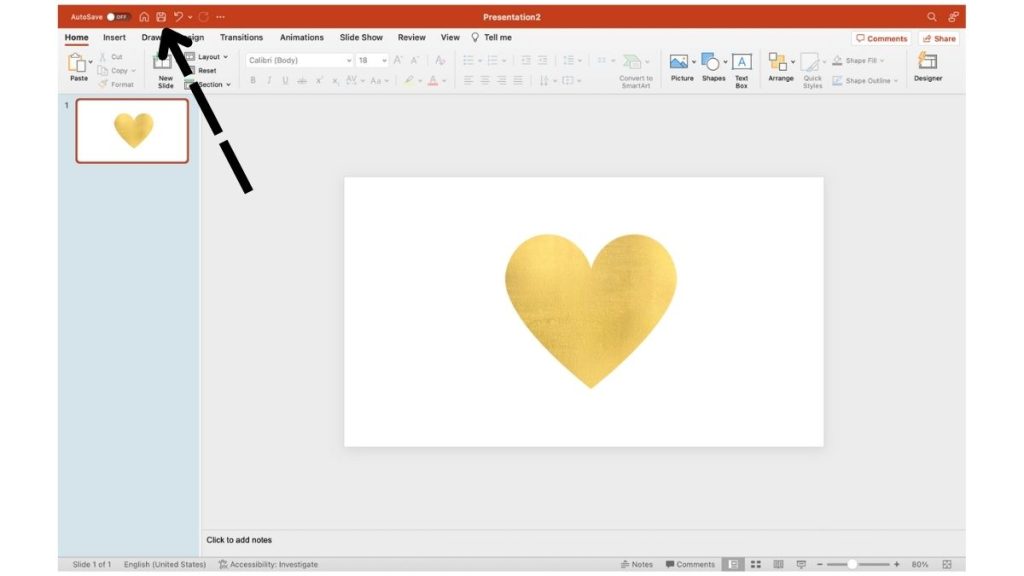
- Then select the PDF format to export. Your file will save in your downloads folder.
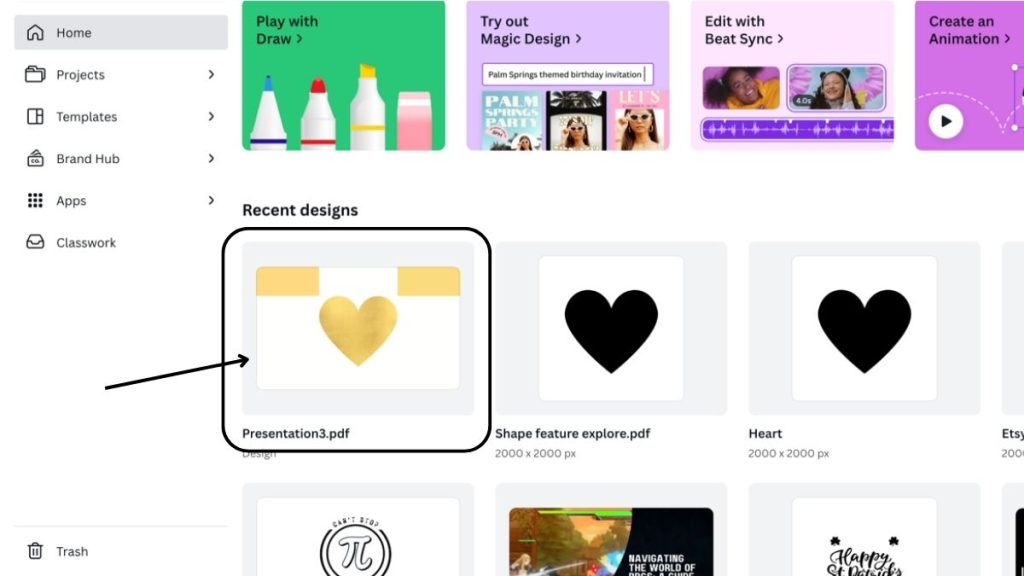
- Next, open the Canva website and click on upload in the top right corner.
- Select the file which you’ve downloaded from MS PowerPoint in PDF format. Soon your file will start importing on canvas. You’ll get that design in the recent design option on Canva.
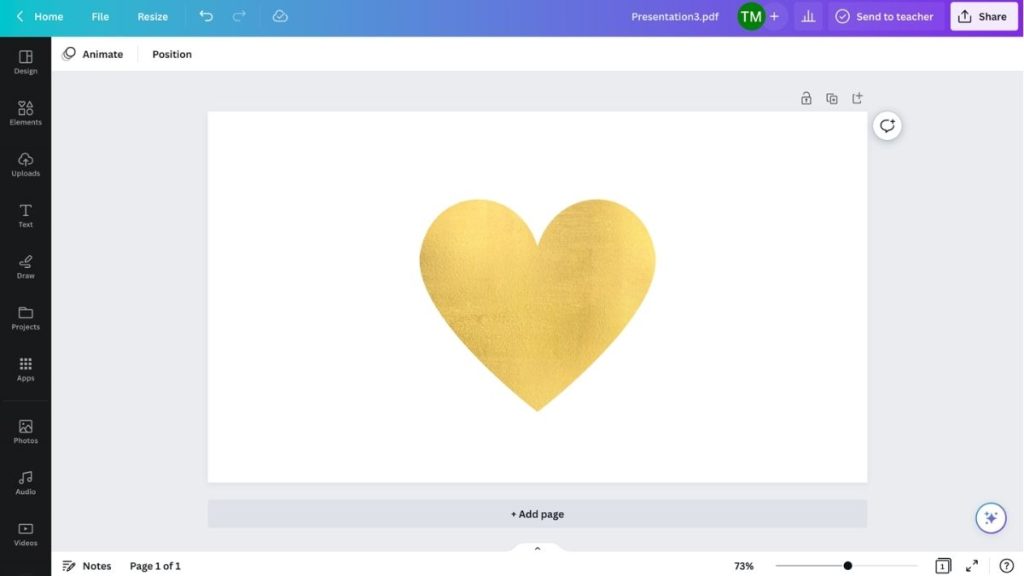
- Click on that design and that will open in a new tab. Here’s your desired shape converted in the frame now.
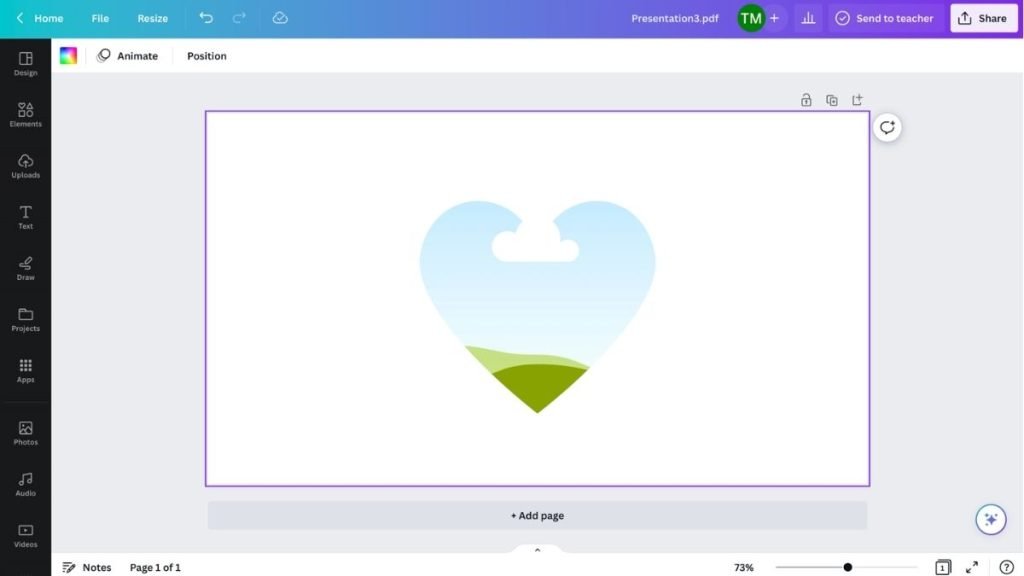
- Now click on the design and delete it. The upper layer will be deleted and the rest of your frame will be there. (Check the screenshot below)
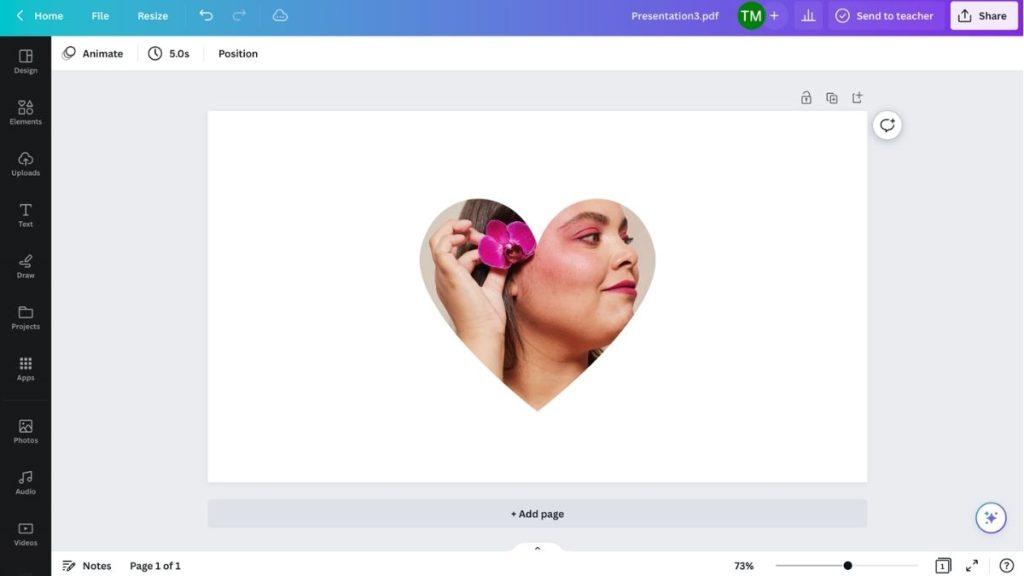
- You can drag any design into your frame now. ( For instance, we’ve dragged a girl image to show our custom frame is working perfectly. )
Hope you learned to create your frame in the Canva step-by-step guide. If you have any queries then drop them in the comment section. We’ll answer your query within 24 hours.
Pro Tip – Do you know that, you can collaborate with your colleague to use, edit, and export this frame in real-time with Canva collaborate feature? Try collaborate feature now to test how it works.
Key Benefits
There are a lot of benefits to creating your frame. Because the number of frames in Canva is too less.
- You can create any type of frame with SVG.
- Make your design more attractive with your frames.
- No dependency on Canva to use their premade frame.
- You can sell your frame as a mockup on marketplaces like Etsy, creative fabrica, and more places.
- Create custom frames for your clients and charge them.
Verdict
Getting knowledge of your daily use software is very beneficial in long term. Hope you learn everything related to frames step by step. By following the steps anyone can create their frames within minutes.
Sharing is caring, help your colleagues, friends, and family members to learn this new skill related to Canva frames.